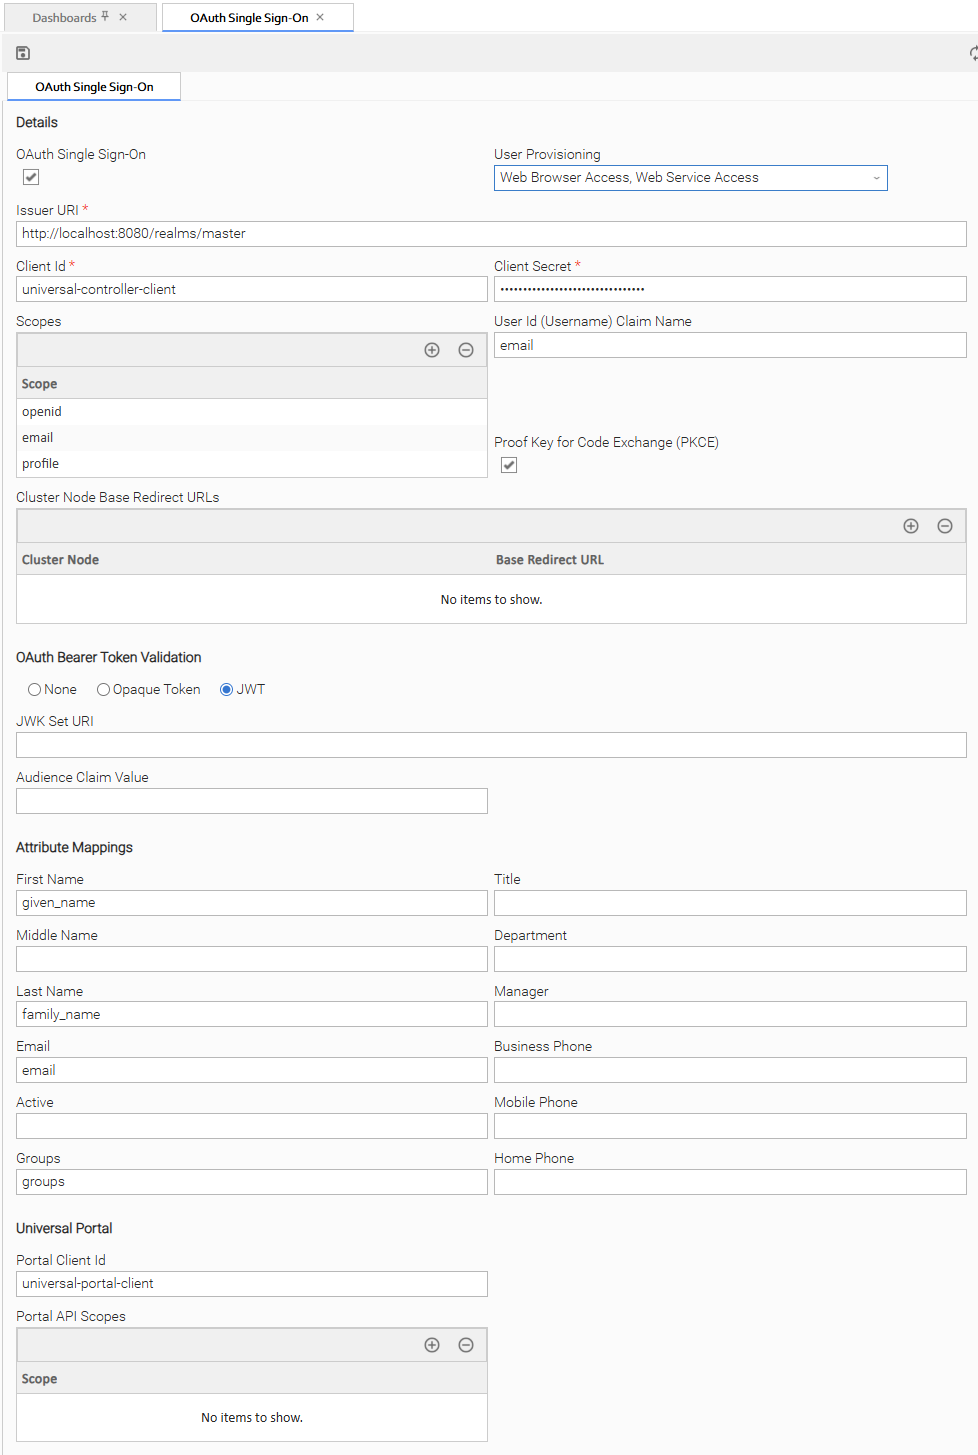
Step 2 | Go to Go to Administration > OAuth Single Sign-on. Configure the fields:
- Check OAuth Single Sign-On.
- Set User Provisioning:
- "Web Browser Access" if you would like to enable SSO for the Universal Controller.
- "Web Service Access" to enable SSO for Universal Portal.
- Set the Issuer URI to the
issuer value you noted earlier.
- Set Client ID to "universal-controller-client".
- Set Client Secret to the value you noted when creating the client for Universal Controller.
- Set Scopes to "openid", "email" and "profile".
- Set User ID (Username) Claim Name. We use "email" claim as the user id, but you can use any claim you prefer.
- Check Proof Key for Code Exchange (PKCE). For simplicity, we do not configure audiences.
- Set OAuth Bearer Token Validation to JWT.
- Set the Attribute Mappings fields to the required attributes from your claims.
- In the Universal Portal section,
- Set Portal Client Id to "universal-portal-client".
- You can leave the Scope empty. Universal Portal scopes are only necessary when using audiences, which this guide does not use.
 |
|---|